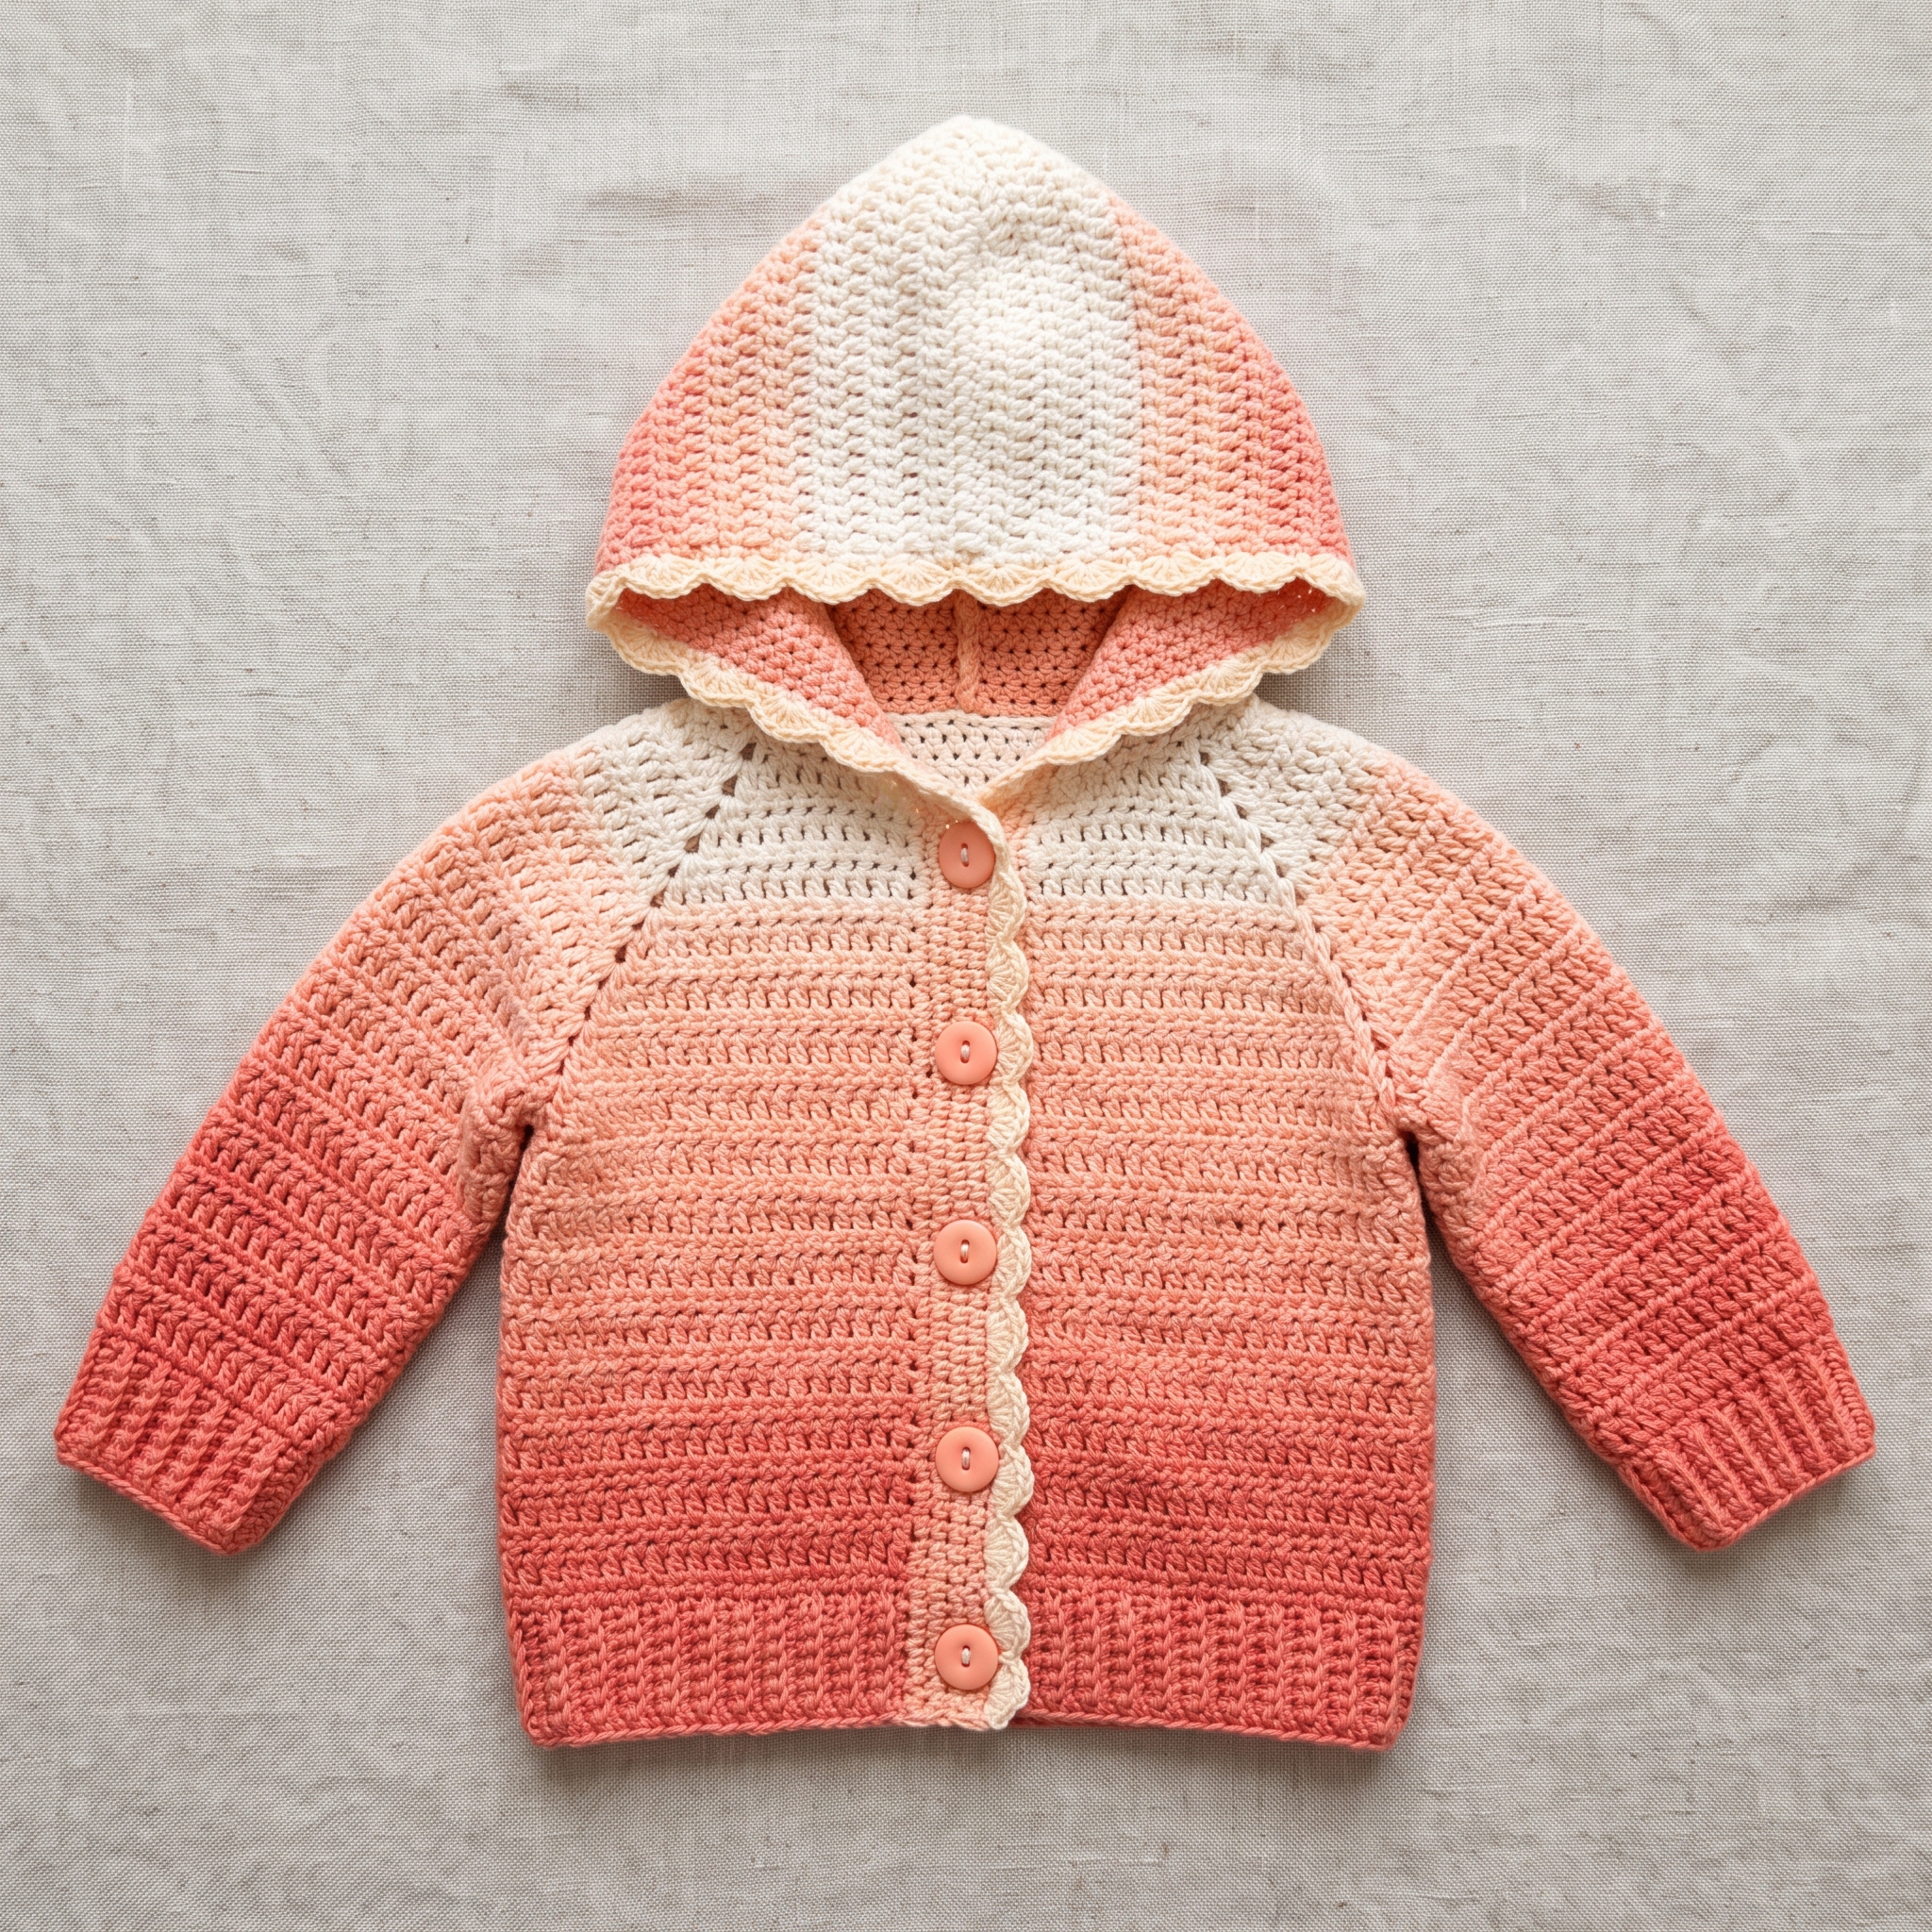
There is something truly magical about watching a gentle gradient unfold row by row as you crochet. This gorgeous little cardigan might just become your absolute favorite handmade baby gift to make. I designed this piece with a soothing cream-to-coral ombre fade, sweet scalloped shell edging, and a cozy hood that makes any baby look like a little woodland forest sprite. It fits seamlessly into a modern nursery wardrobe and brings so much warmth and love to whoever wears it.
[Close-up view of the finished Peach Ombre Baby Hooded Cardigan showing the cream-to-coral ombre fade, raglan yoke, round wooden buttons, and delicate shell stitch edging along the hood and hem]
I promise that even though this pattern looks intricate, it is entirely achievable if you take it one step at a time. If you can work in the round, follow a simple increase sequence, and know your basic stitches, you can absolutely make this. I am going to guide you through every single round and row with complete, explicit instructions so you never have to guess what comes next. Do not stress about perfection—every handmade stitch carries your love.
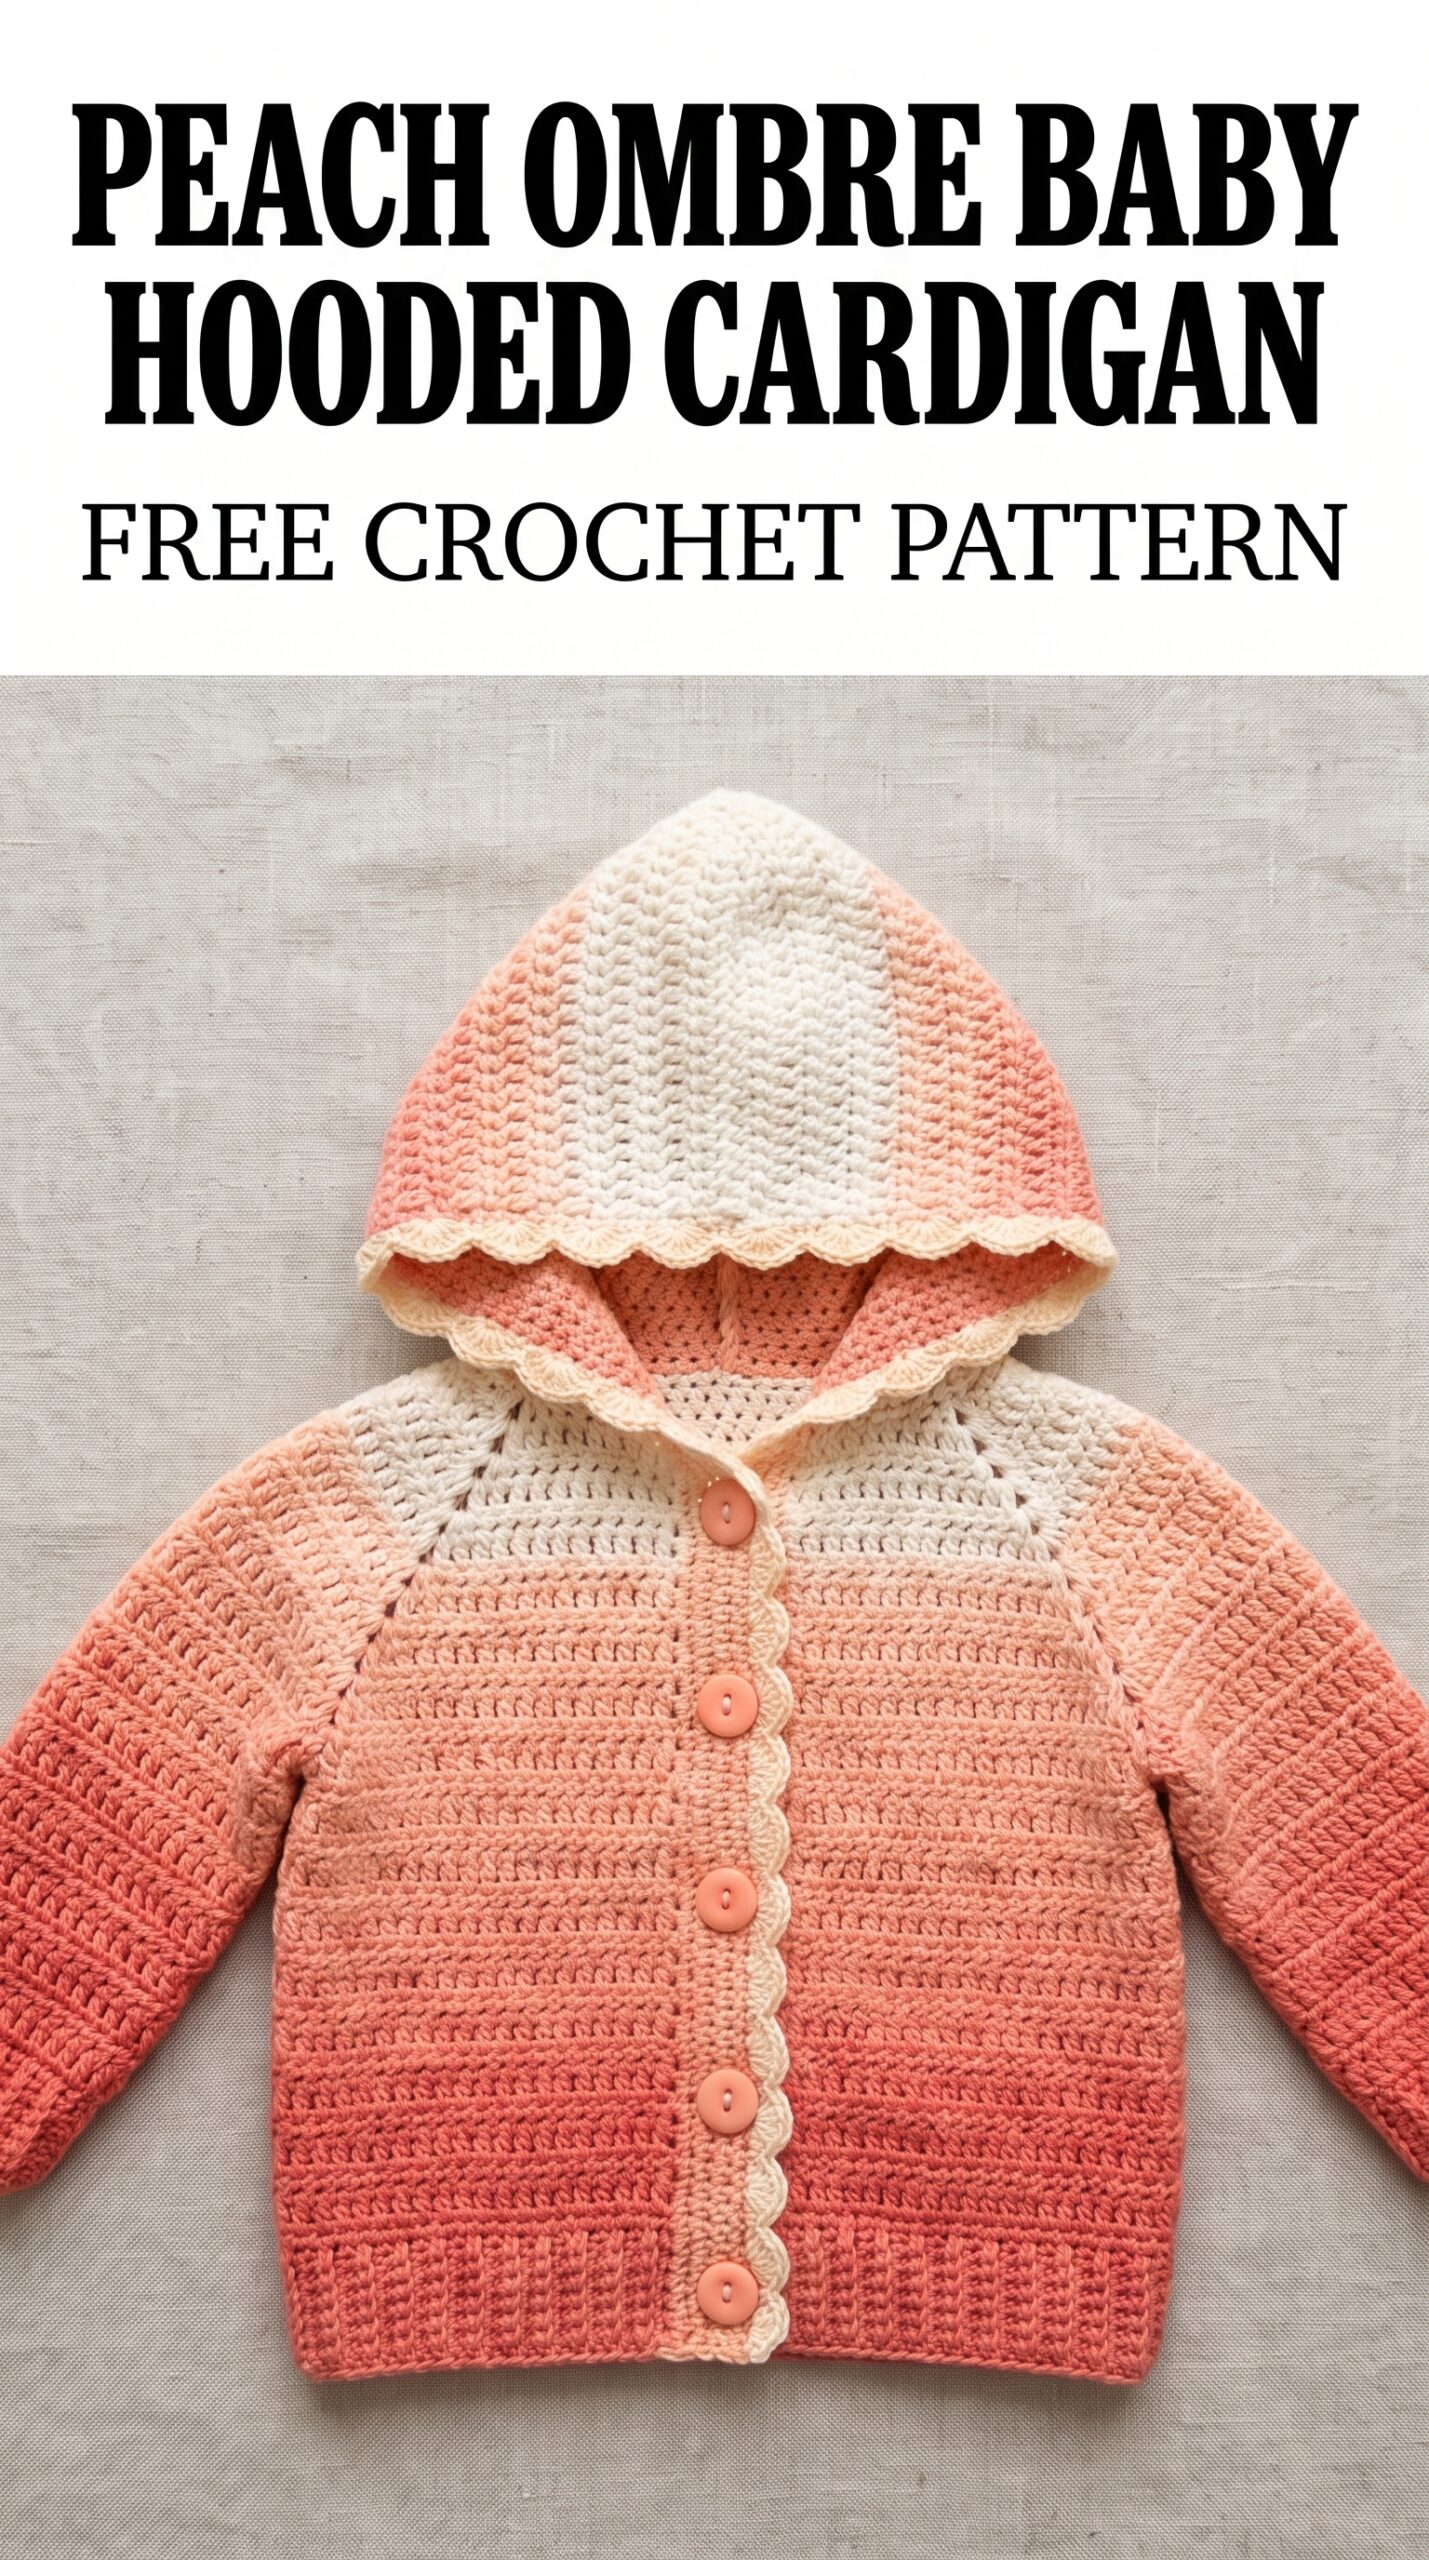
Understanding the Peach Ombre Baby Hooded Cardigan Design
The construction logic behind this cardigan is one of my favorite things in the world of crochet. By working in a seamless top-down construction, we completely eliminate the headache of sewing together individual body panels and sleeves at the end. You start right at the neckline in flat rows to create the front opening, expand through the shoulders using raglan shaping, separate the sleeves, and then finish the body smoothly in the round.
The ombre gradient flows naturally because you change yarn colors at strategic points rather than constantly weaving in ends every row. Color A handles the delicate yoke and sets the foundation, Color B blooms at the underarm separation, Color C carries the midsection warmth, and Color D grounds the piece with deep coral at the hem and cuffs. Finally, the shell stitch edging adds an heirloom polish along the hood, cuffs, front bands, and bottom hem.
Materials You Will Need
Yarn:
- DK weight yarn (CYCA category 3 light), approximately 400 (350, 450, 500) yards total across all four colors
- Color A (Cream or Light Blush): 80 (70, 90, 100) yards
- Color B (Soft Peach): 90 (80, 100, 115) yards
- Color C (Mid Peach or Coral): 110 (100, 120, 135) yards
- Color D (Deep Coral): 120 (100, 140, 150) yards
- Recommended plain text yarn suggestions: Paintbox Yarns Simply DK, Drops Safran, or Paintbox Yarns Cotton DK. Choose a smooth yarn with good stitch definition so your shell edging and ombre fade look crisp and clean.
Hook:
- US size E-4 / 3.5 mm crochet hook (or size needed to meet your exact gauge)
Notions / Additional Supplies:
- 4 locking stitch markers
- Tapestry needle for weaving in ends
- Sharp scissors
- 5 round buttons approximately 12 mm in diameter (coral or blush pink)
- Matching sewing thread and a sewing needle to attach buttons securely
Gauge and Finished Size
Gauge is so important when making garments because we want the cardigan to fit comfortably without being too stiff or too baggy. Take the time to make and block your gauge swatch before you begin casting on.
Gauge Swatch: 18 single crochet stitches by 22 rows equals 4 inches by 4 inches (10 cm by 10 cm) worked in single crochet using your US E-4 / 3.5 mm hook, measured after blocking.
Troubleshooting Tip: If your swatch has more than 18 stitches in 4 inches, your stitches are too tight—try going up one hook size. If your swatch has fewer than 18 stitches, your stitches are too loose—try going down one hook size.
Finished Garment Sizes:
- Newborn: Chest 16 inches (41 cm), length 9 inches (23 cm), sleeve length 6 inches (15 cm)
- 3 to 6 Months: Chest 18 inches (46 cm), length 10 inches (25 cm), sleeve length 7 inches (18 cm)
- 6 to 12 Months: Chest 20 inches (51 cm), length 11 inches (28 cm), sleeve length 7.5 inches (19 cm)
- 12 to 18 Months: Chest 22 inches (56 cm), length 12 inches (30.5 cm), sleeve length 8 inches (20 cm)
Note: The written pattern instructions below are given for size 3 to 6 months. Sizes for Newborn, 6 to 12 months, and 12 to 18 months are listed in parentheses in that exact order throughout the pattern: Newborn (3 to 6 months, 6 to 12 months, 12 to 18 months). When only one number is provided, it applies to every single size.
Skill Level
Skill Level: Intermediate
Specific Skills Needed:
- Working in flat rows and joined rounds
- Following top-down raglan increase sequences
- Changing yarn colors cleanly at the end of rows
- Picking up stitches along finished edges
- Basic decreasing (single crochet two together)
If you have made a few simple garments or baby blankets before, you are more than ready for this project. Take a deep breath, and let's make something wonderful together.
Abbreviations and Stitch Definitions
Let me explain every stitch and abbreviation before we begin so there are no surprises later.
- ch (chain): Wrap the yarn over your hook from back to front, and pull that loop cleanly through the active loop on your hook. This creates the foundation of your crochet work.
- sc (single crochet): Insert your hook directly into the designated stitch, yarn over your hook, and pull up a loop so that you have two loops resting on your hook. Yarn over again, and draw that newly formed loop through both loops on your hook in one smooth motion. This creates a sturdy, dense fabric.
- dc (double crochet): Yarn over your hook from back to front, insert your hook into the designated stitch, and yarn over and pull up a loop so that you have three loops on your hook. Yarn over and pull through the first two loops on your hook. Yarn over a final time and pull through the remaining two loops on your hook. This creates a taller, more fluid stitch.
- sc2tog (single crochet two together – decrease): Insert your hook into the next stitch, yarn over, and pull up a loop so you have 2 loops on your hook. Insert your hook into the very next stitch following that one, yarn over, and pull up a loop so you have 3 loops on your hook. Yarn over once more and draw that loop through all 3 loops on your hook at the same time, turning two stitches into one.
- sl st (slip stitch): Insert your hook into the designated stitch or space, yarn over your hook, and pull that loop directly through the stitch and through the active loop on your hook in one single motion. This is used to join rounds or move across fabric without adding height.
- pm (place marker): Take a locking stitch marker and clip it into the designated stitch or space to hold your place.
- sm (slip marker): As you encounter a stitch marker in your work, lift it or slide it from the old row to the new row so it stays in alignment.
- st(s) (stitch / stitches): The individual loops or worked areas where you place your crochet hook.
- RS (right side): The public-facing, outer side of your cardigan that will be visible when worn.
- WS (wrong side): The inside or back side of your cardigan fabric where your turning rows face away from you.
- sp (space): The open gap underneath a chain stitch or between stitches where you can insert your hook.
- rep (repeat): Do the instructed set of steps again as requested.
- sk (skip): Pass over the designated stitch or stitches without working into them.
- Shell Stitch: Work 5 double crochet stitches all directly into the same identical stitch or chain space. This creates a lovely, rounded fan shape used for our edging.
Pattern Notes Before You Begin
- The cardigan yoke is worked flat in back-and-forth rows to accommodate the open front. Once the underarm separation is reached, the body continues working in joined rounds. The sleeves are also worked in joined rounds.
- The turning chain (ch 1) at the beginning of each single crochet row does NOT count as a stitch. Always place your first single crochet of the row into the very first stitch unless specified otherwise.
- Color changes should always be made on the final yarn over of the last stitch of the previous row. When you have two loops left on your hook for your final stitch, drop the old color and yarn over with the new color to pull through, ensuring a crisp color transition.
- Place your four stitch markers carefully at the raglan points during Row 1, and make sure to move them up faithfully on every increase row.
- The hood is picked up directly along the neckline stitches, worked flat upward in rows, and then seamed at the crown before receiving its shell edging.
- Buttons are sewn securely to the left front band. Buttonholes are created automatically on the right front band during the shell edging round by utilizing the natural gaps between the shell fans.
- Always block your finished garment pieces according to your chosen yarn's specific washing instructions before sewing on buttons or wearing.
How to Crochet the Yoke (Worked Flat, Color A)
The yoke begins right at the neckline with a foundation chain, working entirely in Color A (Cream).
Foundation Chain: Ch 39 (39, 41, 43).
Row 1 (RS): Sc in 2nd ch from hook and in each ch across. Turn. Stitch count: 38 (38, 40, 42) sc.**
Now, we must set up our four stitch markers to divide our yoke into right front, right sleeve, back, left sleeve, and left front sections. Count your stitches carefully from the right edge and place a locking stitch marker into the space between the indicated stitches:
- For 3 to 6 Months (38 sts): Work 7 sc for right front, pm, work 6 sc for right sleeve, pm, work 12 sc for back, pm, work 6 sc for left sleeve, pm, work 7 sc for left front. (7 + 6 + 12 + 6 + 7 = 38 sts)
- For Newborn (38 sts): Work 7 sc for right front, pm, work 6 sc for right sleeve, pm, work 12 sc for back, pm, work 6 sc for left sleeve, pm, work 7 sc for left front. (7 + 6 + 12 + 6 + 7 = 38 sts)
- For 6 to 12 Months (40 sts): Work 7 sc for right front, pm, work 7 sc for right sleeve, pm, work 12 sc for back, pm, work 7 sc for left sleeve, pm, work 7 sc for left front. (7 + 7 + 12 + 7 + 7 = 40 sts)
- For 12 to 18 Months (42 sts): Work 7 sc for right front, pm, work 8 sc for right sleeve, pm, work 12 sc for back, pm, work 8 sc for left sleeve, pm, work 7 sc for left front. (7 + 8 + 12 + 8 + 7 = 42 sts)
Working the Raglan Increase Rows
On every Wrong Side (WS) row, you will work raglan increases at all 4 markers, adding 2 stitches at each marker point for a total of 8 stitches added per increase row. On every Right Side (RS) row, you will work a plain row of single crochet across without any increases.
Row 2 (WS): Ch 1, turn. Work sc in each st up to the first marker, work [1 sc, ch 1, 1 sc] right into the marked stitch (raglan increase made, slip marker), continue working sc across to the next marker, work [1 sc, ch 1, 1 sc] in marked stitch, repeat this increase at each of the 4 markers, and sc to the end of the row. Turn. Stitch count: 46 (46, 48, 50) sts.**
Row 3 (RS): Ch 1, turn. Sc in each st and in each ch-1 space across. Turn. Stitch count: 46 (46, 48, 50) sts.**
Row 4 (WS): Ch 1, turn. Sc across to first marker, working raglan increases ([1 sc, ch 1, 1 sc]) at all 4 marked raglan points, slipping markers as you go, and sc to the end of the row. Turn. Stitch count: 54 (54, 56, 58) sts.**
Row 5 (RS): Ch 1, turn. Sc in each st and in each ch-1 space across. Turn. Stitch count: 54 (54, 56, 58) sts.**
Row 6 (WS): Ch 1, turn. Sc across to first marker, working raglan increases at all 4 marked raglan points, and sc to the end of the row. Turn. Stitch count: 62 (62, 64, 66) sts.**
Row 7 (RS): Ch 1, turn. Sc in each st and in each ch-1 space across. Turn. Stitch count: 62 (62, 64, 66) sts.**
Row 8 (WS): Ch 1, turn. Sc across to first marker, working raglan increases at all 4 marked raglan points, and sc to the end of the row. Turn. Stitch count: 70 (70, 72, 74) sts.**
Row 9 (RS): Ch 1, turn. Sc in each st and in each ch-1 space across. Turn. Stitch count: 70 (70, 72, 74) sts.**
Row 10 (WS): Ch 1, turn. Sc across to first marker, working raglan increases at all 4 marked raglan points, and sc to the end of the row. Turn. Stitch count: 78 (78, 80, 82) sts.**
Row 11 (RS): Ch 1, turn. Sc in each st and in each ch-1 space across. Turn. Stitch count: 78 (78, 80, 82) sts.**
Row 12 (WS): Ch 1, turn. Sc across to first marker, working raglan increases at all 4 marked raglan points, and sc to the end of the row. Turn. Stitch count: 86 (86, 88, 90) sts.**
Row 13 (RS): Ch 1, turn. Sc in each st and in each ch-1 space across. Turn. Stitch count: 86 (86, 88, 90) sts.**
For Newborn and 3 to 6 Months sizes: Stop yoke increases here. Fasten off Color A.
For 6 to 12 Months and 12 to 18 Months sizes, continue working the following rows:
Row 14 (WS): Ch 1, turn. Sc across to first marker, working raglan increases at all 4 marked raglan points, and sc to the end of the row. Turn. Stitch count: (94, 98) sts.**
Row 15 (RS): Ch 1, turn. Sc in each st and in each ch-1 space across. Turn. Stitch count: (94, 98) sts.**
Row 16 (WS): Ch 1, turn. Sc across to first marker, working raglan increases at all 4 marked raglan points, and sc to the end of the row. Turn. Stitch count: (102, 106) sts.**
Row 17 (RS): Ch 1, turn. Sc in each st and in each ch-1 space across. Turn. Stitch count: (102, 106) sts.**
For 6 to 12 Months size: Stop yoke increases here. Fasten off Color A.
For 12 to 18 Months size, continue working the following rows:
Row 18 (WS): Ch 1, turn. Sc across to first marker, working raglan increases at all 4 marked raglan points, and sc to the end of the row. Turn. Stitch count: (114) sts.**
Row 19 (RS): Ch 1, turn. Sc in each st and in each ch-1 space across. Turn. Stitch count: (114) sts.** Fasten off Color A.
How to Crochet the Body (Color B, C, and D)
Now that your yoke is complete, we will join the front and back pieces together at the underarms while skipping over the sleeve stitches. We will also switch to Color B (Soft Peach) on our final yarn over to start our gorgeous ombre gradient.
Round 1 (Separation Round – Color B): With the Right Side facing you, attach Color B to the right front edge.
- Sc across the right front stitches up to the first raglan marker.
- Sk all the stitches of the right sleeve (from the first marker to the second marker).
- Chain 3 (4, 4, 5) loosely to bridge the underarm gap.
- Sc across the back stitches from the second marker to the third marker.
- Sk all the stitches of the left sleeve (from the third marker to the fourth marker).
- Chain 3 (4, 4, 5) loosely to bridge the second underarm gap.
- Sc across the remaining left front stitches to the front edge.
- Join with a slip stitch to the first single crochet to form a working round. Turn your work so you can work in rounds, or continue in joined rounds as preferred (we will work joined rounds from here on).
Stitch count: Body stitches plus underarm chains.
Rounds 2 through 6 (Color B): Ch 1, sc in each stitch and in each chain across the entire round. Join with a sl st to the first sc. Turn.
At this point, your soft peach section is established. Let's transition to Color C (Mid Peach/Coral) to continue the sunset fade.
Rounds 7 through 12 (Color C): On the final slip stitch of Round 6, change to Color C. Ch 1, sc in each stitch around. Join with a sl st to the first sc. Turn.
Now, let's bring in our final body color, Color D (Deep Coral), to frame the bottom hem.
Rounds 13 through 16 (Color D): On the final slip stitch of Round 12, change to Color D. Ch 1, sc in each stitch around. Join with a sl st to the first sc. Turn.
Adding the Bottom Hem Shell Edging
Round 17 (Edging Round – Color D): Ch 1, sc in the very first stitch. Skip 2 stitches, work 5 double crochet all into the next stitch (shell made), skip 2 stitches, sc in the next stitch. Repeat from to all the way around the bottom hem of the cardigan. Join with a sl st to the first single crochet. Fasten off Color D and weave in your ends securely.
How to Crochet the Sleeves (Make 2 – Color B, C, and D)
With the Right Side facing you, attach Color B (Soft Peach) at the center of the underarm chain space you created during the body separation round.
Round 1 (Color B): Ch 1, work sc evenly across the underarm chain stitches, then work sc into each held sleeve stitch around the armhole opening, ending back at the underarm. Join with a sl st to the first sc. Turn.
Rounds 2 through 4 (Color B): Ch 1, sc in each stitch around. Join with a sl st to the first sc. Turn.
To give the sleeve a gentle tapered shape, we will work a decrease round in Color B.
Round 5 (Color B – Decrease Round): Ch 1, work sc2tog near the underarm, sc in each remaining stitch around the sleeve. Join with a sl st to the first sc. Turn.
Rounds 6 through 9 (Color C): On the final slip stitch of Round 5, change to Color C (Mid Peach/Coral). Ch 1, sc in each stitch around. Join with a sl st to the first sc. Turn.
Rounds 10 through 13 (Color D): On the final slip stitch of Round 9, change to Color D (Deep Coral). Ch 1, sc in each stitch around. Join with a sl st to the first sc. Turn.
Adding the Cuff Shell Edging
Round 14 (Cuff Edging – Color D): Ch 1, sc in the first stitch. Skip 2 stitches, work 5 dc all into the next stitch (shell made), skip 2 stitches, sc in the next stitch. Repeat from to around the sleeve cuff. Join with a sl st to the first single crochet. Fasten off Color D and weave in all ends. Repeat this entire sleeve process for the second sleeve.
How to Crochet the Hood
The hood is picked up directly along the unworked neck stitches of our original foundation chain, working upward in flat rows using Color A (Cream).
Row 1: With the Right Side facing you, attach Color A to the right front neck edge. Sc evenly across the entire neckline up to the left front edge. Turn. Stitch count: Matches total neck opening stitches.
Rows 2 through 18 (or until hood reaches approximately 7 to 8 inches in height): Ch 1, turn. Sc in each stitch across the row. Turn.
When your hood has reached the desired height, fold the top edge of the hood in half matching the left and right sides together. Use a tapestry needle and a length of Color A yarn to whipstitch or mattress stitch the top crown seam closed. Fasten off securely.
Adding the Hood Opening Shell Edging
Attach Color A (Cream) at the bottom corner of the hood face opening. Working along the raw edge of the hood opening, work a row of shell edging: Sc in the first stitch, skip 2 stitches, work 5 dc into the next stitch (shell made), skip 2 stitches, sc in the next stitch, repeat from to all the way around the face opening of the hood. Fasten off Color A and weave in all remaining yarn tails.
Assembly and Finishing
Because we used a top-down seamless construction, your assembly work is practically zero! You only need to check that all yarn ends are securely woven into the wrong side of your crochet fabric using your tapestry needle.
Adding the Front Band Edging and Buttonholes
Attach Color A (Cream) at the bottom right front corner of the cardigan opening. Work a row of shell edging straight up the right front band, around the hood opening, and down the left front band. Note on Buttonholes: On the right front band, utilize the natural hollow spaces between the 5-double-crochet shell fans as your buttonholes. They are perfectly sized to fit 12 mm round buttons without needing extra chains.
Attaching the Buttons
Lay your cardigan flat on a blocking mat or flat surface. Position your 5 round buttons along the left front band, ensuring they align perfectly with the buttonhole gaps on the right front band. Using matching sewing thread and a sewing needle, sew each button securely in place through both the button and the crochet fabric.
Sizing Adjustments
If you want to customize the sizing of this cardigan beyond the four provided sizes, it is wonderfully forgiving. To make the cardigan wider or narrower in the chest, adjust your starting foundation chain by multiples of 4 plus 2 stitches. To make the body longer before adding the hem edging, simply work a few extra rounds in Color C or Color D before beginning your final shell stitch round. Always remember that adding length will require slightly more yarn yardage.
Tips for Success
- Consistent Tension: Keep your yarn tension steady, especially when switching colors, so your fabric maintains an even, professional drape.
- Weave As You Go: Tackle your loose yarn ends immediately after finishing each color section so you aren't overwhelmed with a mountain of ends at the end.
- Embrace Handmade Charm: Do not stress over tiny imperfections. Every single stitch reflects your care, and a handmade baby garment is treasured precisely because a human hand made it with love.
- Block Before Sewing: Always give your finished cardigan a gentle steam or wet block before attaching buttons to ensure the stitches relax into their final shape.
Wear It Your Way
This sweet peach ombre cardigan is versatile enough for chilly morning walks in the stroller, family gatherings, holiday photoshoots, or as a treasured keepsake displayed on a nursery shelf. While the peach ombre gradient is breathtaking, you can easily customize this pattern with a navy-to-sky-blue nautical gradient, a rich autumn harvest palette of rust and mustard, or even a classic cream monochrome look where the shell stitch edging provides the primary visual interest.
Final Thoughts
Thank you so much for joining me on this crochet journey. I hope you fall deeply in love with every stitch of this Peach Ombre Baby Hooded Cardigan and that it brings immense joy to whoever receives it.
Be sure to save this post to your Pinterest boards so you can easily find it whenever you are ready to cast on your next baby gift. I would love to see your color choices and finished cardigans—drop a comment below and tell me what shades you used!
Happy hooking, friend. You have got this.