

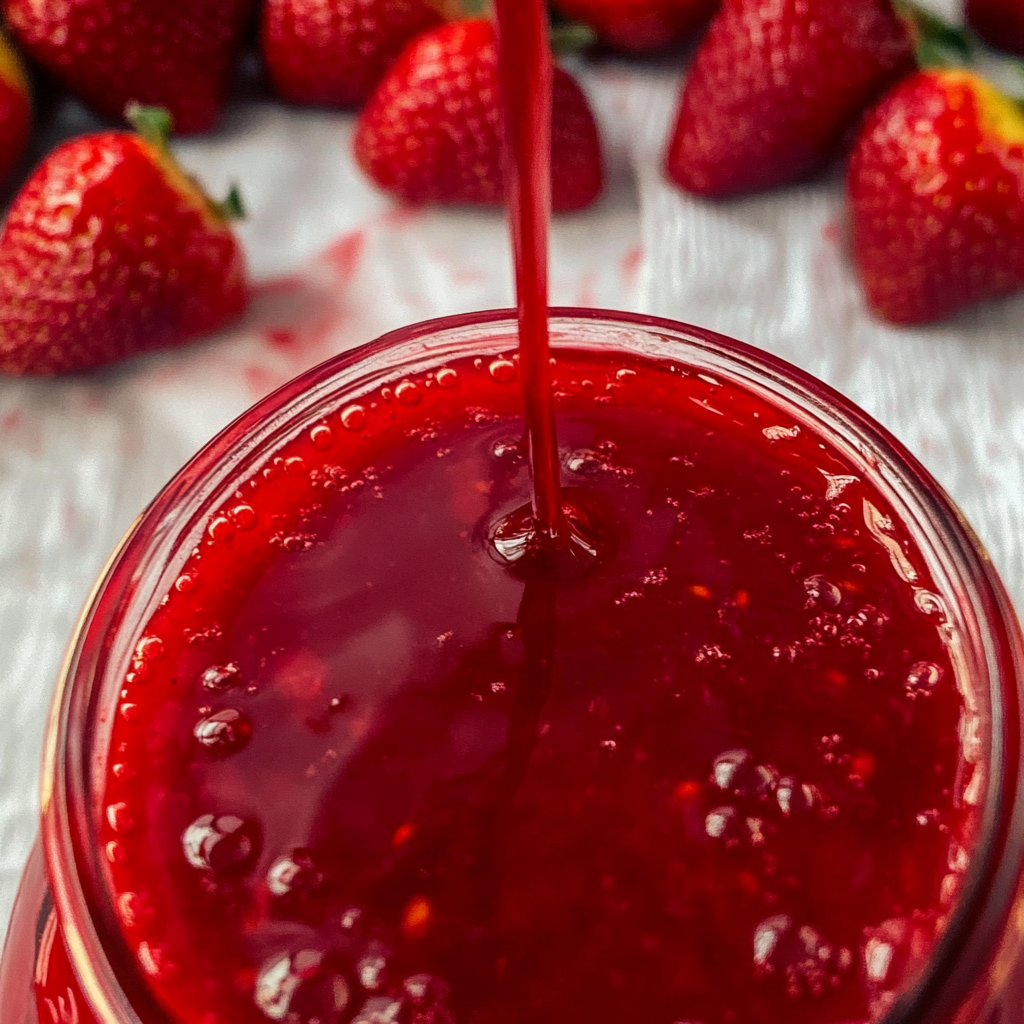
A Homemade Strawberry Syrup Recipe is the perfect addition to your breakfast table or dessert spread. This delightful syrup boasts a fresh, fruity flavor that’s sure to impress guests on any occasion. Whether you’re drizzling it over pancakes, mixing it into yogurt, or using it in desserts, this syrup’s smooth texture and vibrant taste will elevate your dishes.
Why You’ll Love This Recipe
- Easy to Make: With just a few simple steps, you can create a delicious syrup at home.
- Fresh Flavors: Using ripe strawberries ensures that your syrup is bursting with natural sweetness.
- Versatile Uses: Perfect for pancakes, waffles, desserts, and even as a topping for ice cream!
- Natural Ingredients: Made with wholesome ingredients, you’ll know exactly what’s in every drop.
- Long-Lasting: Store it in the fridge for up to two weeks and enjoy its freshness over time.
Tools and Preparation
To make your Homemade Strawberry Syrup Recipe, you’ll need some essential tools to help streamline the process. Here’s what you’ll need:
Essential Tools and Equipment
- Blender
- Fine mesh sieve
- Saucepan
- Silicone spatula
Importance of Each Tool
- Blender: Essential for creating a smooth strawberry puree that serves as the base of your syrup.
- Fine mesh sieve: Helps separate the pulp from the liquid, ensuring a silky-smooth final product.
- Saucepan: Used for cooking the syrup and achieving the right consistency over heat.
- Silicone spatula: Perfect for scraping down the sides of bowls and pots without damaging them.
Ingredients
To prepare this delicious syrup, gather the following ingredients:
Fresh Ingredients
- 350 grams strawberries (15-18 strawberries or 3/4 lb)
- 100 grams granulated sugar (1/2 cup)
- 118 milliliters water (1/2 cup)
- 1/2 tablespoon lemon juice
How to Make Homemade Strawberry Syrup Recipe
Step 1: Prepare the Strawberries
- Remove the core and leaves of the strawberries by hulling with a paring knife or using a melon baller.
Step 2: Blend Ingredients
- Combine all the berries and water into a blender.
- Puree until smooth.
Step 3: Strain the Puree
- Pour puree into a fine mesh sieve set over a saucepan.
- Use a silicone spatula or spoon to press and work the puree through until only thick seedy pulp remains.
- Discard the pulp.
Step 4: Cook the Syrup
- Place the pot over medium heat.
- Add in the sugar and lemon juice; stir until dissolved.
- Bring to a gentle boil and stir occasionally until syrup is thickened and coats the back of a spoon without running off—about 10 minutes.
Step 5: Cool and Store
- Allow to cool before pouring into an airtight container.
- Store in fridge for up to two weeks.
Enjoy your homemade strawberry syrup on various dishes!
How to Serve Homemade Strawberry Syrup Recipe
Homemade strawberry syrup is a versatile treat that can elevate various dishes. Whether you’re looking to enhance breakfast or add a sweet touch to desserts, this syrup is perfect for many occasions.
On Pancakes and Waffles
- Drizzle over fluffy pancakes or crispy waffles for a deliciously sweet start to your day.
In Yogurt or Oatmeal
- Swirl into yogurt or oatmeal for added flavor and a pop of color in your morning bowl.
As a Sundae Topping
- Use as a topping on ice cream sundaes to create a delightful summer dessert.
Mixed into Smoothies
- Blend into smoothies for extra sweetness and a hint of strawberry goodness.
With Fresh Fruit Salad
- Pour over fresh fruit salads to enhance the natural flavors and add a sticky-sweet glaze.
In Cocktails or Mocktails
- Add a splash to your favorite non-alcoholic beverages for a sweet, fruity twist.
How to Perfect Homemade Strawberry Syrup Recipe
Creating the perfect homemade strawberry syrup is easier with these handy tips. Follow these simple guidelines for the best results.
- Choose ripe strawberries: Selecting fresh, ripe strawberries ensures maximum sweetness and flavor in your syrup.
- Adjust sugar levels: Depending on your preference, you can reduce or increase the sugar amount for a sweeter or less sweet syrup.
- Strain well: Make sure to thoroughly strain the puree to achieve a smooth texture without any seeds or pulp.
- Monitor cooking time: Keep an eye on the syrup while cooking; overcooking can lead to an overly thick consistency.
- Store properly: Use an airtight container and store in the fridge to maintain freshness for up to two weeks.
Best Side Dishes for Homemade Strawberry Syrup Recipe
Pairing side dishes with homemade strawberry syrup can enhance your meal even further. Here are some delightful options:
- French Toast: Thick slices of bread soaked in egg batter, cooked until golden brown, and topped with strawberry syrup for sweetness.
- Cheese Blintzes: Delicate crepes filled with cheese and served warm, drizzled with strawberry syrup for added richness.
- Granola Parfaits: Layer granola, yogurt, and fresh fruits in a glass, then drizzle with strawberry syrup for a nutritious snack.
- Pound Cake Slices: Serve moist pound cake slices with strawberry syrup on top for an elegant dessert option.
- Cottage Cheese Bowl: A bowl of cottage cheese topped with fruit and homemade strawberry syrup makes for a protein-rich breakfast.
- Scones: Enjoy freshly baked scones spread with butter and drizzled with strawberry syrup for added sweetness at tea time.
- Rice Pudding: Creamy rice pudding topped with strawberry syrup brings together comforting flavors that delight the taste buds.
- Muffins: Sweet muffins paired with strawberry syrup offer a tasty breakfast treat that’s easy to enjoy on-the-go.
Common Mistakes to Avoid
Making homemade strawberry syrup can be simple, but some common pitfalls may affect the final product. Here are a few mistakes to watch out for:
- Using Overripe Strawberries: Overripe strawberries can result in a syrup that is too sweet and lacks flavor. Always choose fresh, firm strawberries for the best taste.
- Skipping the Straining Step: Failing to strain the puree can lead to a chunky syrup. Make sure to strain thoroughly to achieve that smooth consistency.
- Not Measuring Ingredients Accurately: Inaccurate measurements of sugar or water can alter the syrup’s thickness and sweetness. Use precise measurements for consistent results.
- Cooking at Too High a Temperature: Cooking the syrup at high heat can cause it to burn or caramelize, leading to an off flavor. Keep the heat medium and stir regularly.
- Ignoring Storage Guidelines: Not storing the syrup properly can compromise its quality. Use airtight containers and refrigerate promptly after cooling.
Storage & Reheating Instructions
Refrigerator Storage
- Store homemade strawberry syrup in an airtight container.
- It will last up to two weeks in the refrigerator.
Freezing Homemade Strawberry Syrup Recipe
- Pour cooled syrup into freezer-safe containers or ice cube trays.
- Frozen syrup can last up to three months; just thaw before use.
Reheating Homemade Strawberry Syrup Recipe
- Oven: Preheat your oven to 350°F (175°C) and place the container (oven-safe) inside for about 10 minutes, checking frequently.
- Microwave: Heat in short bursts of 20 seconds until warm, stirring in between for even heating.
- Stovetop: Warm on low heat in a saucepan, stirring regularly until heated through.
Frequently Asked Questions
Here are some common questions about our Homemade Strawberry Syrup Recipe:
How do I make my Homemade Strawberry Syrup Recipe thicker?
To thicken your syrup, cook it a bit longer over medium heat, allowing more water to evaporate until it coats the back of a spoon.
Can I use frozen strawberries for this recipe?
Yes! Frozen strawberries work well too; just thaw them before blending to ensure they puree smoothly.
How can I customize my Homemade Strawberry Syrup Recipe?
You can add flavors like vanilla extract or mint for a unique twist. Experiment with spices like cinnamon for added depth!
What other uses are there for strawberry syrup?
Homemade strawberry syrup is great on pancakes, waffles, yogurt, or as a topping for desserts like ice cream and cakes.
Final Thoughts
This Homemade Strawberry Syrup Recipe is not only delightful but also incredibly versatile. With its rich flavor and smooth texture, it’s perfect for breakfast or dessert. Feel free to customize it with your favorite flavors or use different fruits for variations!
Homemade Strawberry Syrup
Elevate your breakfast and dessert game with this Homemade Strawberry Syrup Recipe, a delightful blend of fresh strawberries and natural sweetness. Perfect for drizzling over pancakes, swirling into yogurt, or topping ice cream sundaes, this syrup is a simple yet delicious addition to any meal. Made with just a few wholesome ingredients, it bursts with vibrant flavor and can be easily stored for up to two weeks in the refrigerator. Whether you’re entertaining guests or treating yourself, this syrup will impress with its smooth texture and fruity goodness.
- Prep Time: 10 minutes
- Cook Time: 10 minutes
- Total Time: 20 minutes
- Yield: Approximately 10 servings 1x
- Category: Dessert
- Method: Cooking
- Cuisine: American
Ingredients
- 350 grams fresh strawberries (about 15-18)
- 100 grams granulated sugar (1/2 cup)
- 118 milliliters water (1/2 cup)
- 1/2 tablespoon lemon juice
Instructions
- Hull the strawberries by removing the core and leaves.
- In a blender, combine strawberries and water; puree until smooth.
- Strain the mixture through a fine mesh sieve over a saucepan to remove pulp.
- Over medium heat, add sugar and lemon juice to the strained puree; stir until dissolved.
- Bring to a gentle boil, stirring occasionally until thickened (about 10 minutes).
- Allow syrup to cool before transferring to an airtight container for storage.
Nutrition
- Serving Size: 30g
- Calories: 50
- Sugar: 12g
- Sodium: 0mg
- Fat: 0g
- Saturated Fat: 0g
- Unsaturated Fat: 0g
- Trans Fat: 0g
- Carbohydrates: 13g
- Fiber: 1g
- Protein: 0g
- Cholesterol: 0mg