

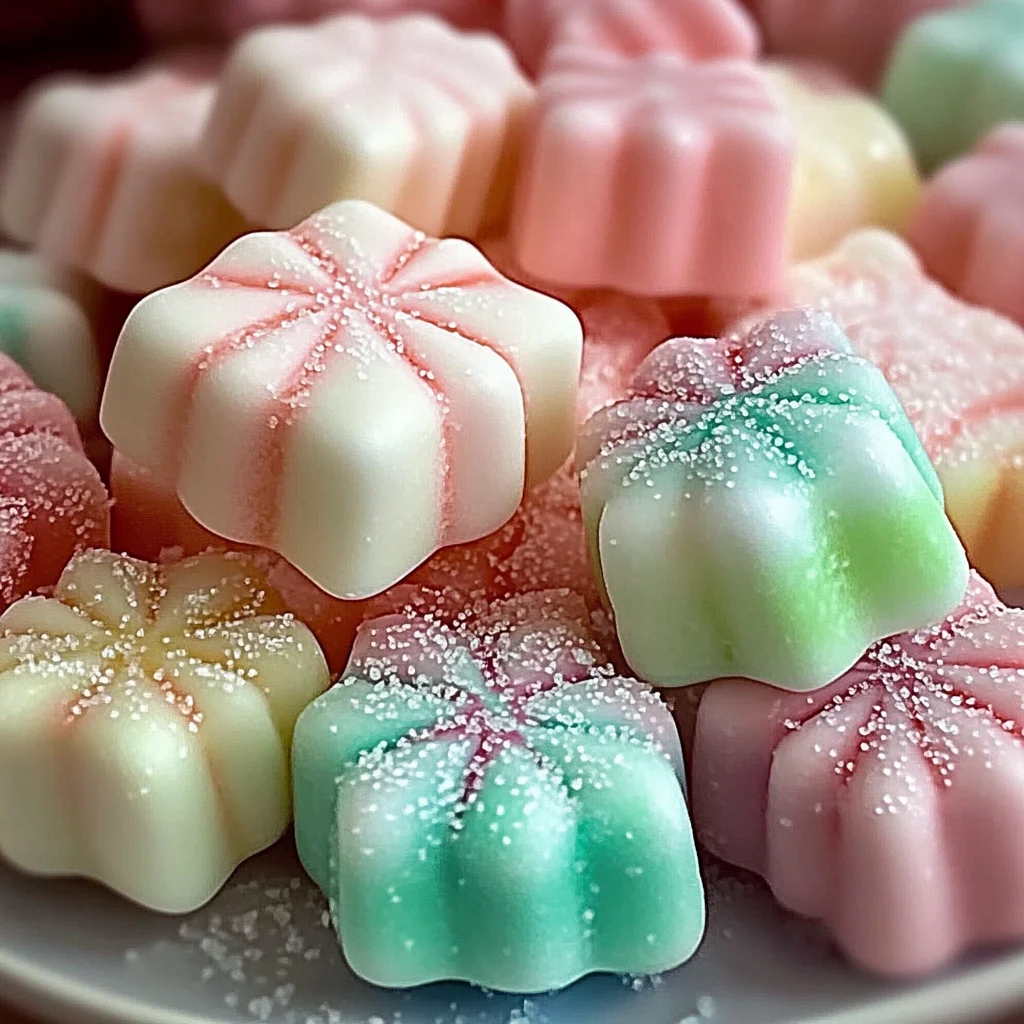
Sweet, creamy, and nostalgic—these Old-Fashioned Butter Mints are the perfect bite-sized treat for any celebration. Whether you’re looking for a quick holiday candy, easy party favor, or vintage dessert idea, these mints check all the boxes. With a melt-in-your-mouth texture and just a kiss of peppermint, they bring back fond memories of family gatherings and dessert tables. No baking required, minimal ingredients, and customizable colors—ideal for anyone looking for a quick dessert or easy recipe to impress.
Why You’ll Love This Recipe
- Easy Preparation: This recipe is straightforward and requires no baking, making it accessible for everyone.
- Customizable Colors: You can easily add gel food coloring to suit any occasion or theme.
- Fun for All Ages: Making these mints is a great activity to involve kids or friends—everyone loves to get creative!
- Perfect for Gifting: These mints make delightful edible gifts for holidays, weddings, or parties.
- Nostalgic Flavor: The classic peppermint flavor brings back cherished memories of childhood treats.
Tools and Preparation
Before you start making your Old-Fashioned Butter Mints, gather the necessary tools. Having everything ready will streamline your process and ensure a smooth experience.
Essential Tools and Equipment
- Mixing bowl
- Electric mixer or hand mixer
- Parchment paper
- Scraper or knife
- Rolling pin (optional)
Importance of Each Tool
- Mixing bowl: A large mixing bowl allows you to combine all ingredients easily without mess.
- Electric mixer: This tool saves time and energy when beating the butter until creamy.
- Parchment paper: Laying out your mints on parchment prevents sticking and makes cleanup simple.
- Scraper or knife: A scraper or sharp knife helps in cutting the dough into perfect bite-sized pieces.
Ingredients
For the Old-Fashioned Butter Mints
- 1/2 cup unsalted butter, softened
- 4 cups powdered sugar
- 1 tablespoon heavy cream or milk
- 1/2 teaspoon peppermint extract
- 1 pinch salt
- gel food coloring (optional)
How to Make Old-Fashioned Butter Mints
Step 1: Beat the Butter
Beat the softened butter in a large mixing bowl until smooth and creamy. This creates the base of your mints.
Step 2: Add Flavorings
Add peppermint extract, salt, and cream. Mix well until combined.
Step 3: Incorporate Sugar
Gradually mix in powdered sugar until a soft dough forms. Ensure that all sugar is well incorporated.
Step 4: Color Your Mints
If using coloring, divide dough into portions according to how many colors you want. Knead in gel food coloring until evenly distributed.
Step 5: Shape the Dough
Roll dough into thin ropes on a powdered sugar surface. The sugar will prevent sticking.
Step 6: Cut Into Pieces
Cut ropes into bite-sized pieces using a scraper or knife. Aim for uniform sizes for even drying.
Step 7: Dry the Mints
Spread mints on parchment paper allowing space between each piece. Let them dry at room temperature for 8 hours or overnight before serving.
How to Serve Old-Fashioned Butter Mints
Old-Fashioned Butter Mints are delightful treats that can elevate any gathering. They are versatile and can be served in various ways, making them ideal for parties, holidays, and special occasions.
As Party Favors
- Place individual mints in small bags or boxes for guests to take home as a sweet reminder of the event.
On Dessert Tables
- Arrange them on a decorative platter alongside other sweets for a colorful and inviting dessert display.
With Coffee or Tea
- Serve these mints alongside warm beverages as a refreshing palate cleanser after a meal.
As Edible Gifts
- Package mints in mason jars with ribbons for thoughtful homemade gifts during holidays or celebrations.
During Family Gatherings
- Offer them as a nostalgic treat that brings back fond memories while enjoying time with loved ones.
How to Perfect Old-Fashioned Butter Mints
Creating the perfect Old-Fashioned Butter Mints involves attention to detail. Here are some tips to ensure your mints are simply irresistible.
- Use room temperature butter: This makes it easier to achieve a smooth and creamy texture, ensuring the best mouthfeel.
- Sift powdered sugar: Sifting helps eliminate lumps and gives your mints a smoother finish.
- Experiment with flavors: While peppermint is classic, try adding other extracts like vanilla or lemon for unique twists.
- Knead coloring evenly: If using gel food coloring, knead it thoroughly into the dough for an even color throughout.
- Allow proper drying time: Letting the mints dry overnight ensures they maintain their shape and texture when served.
- Store properly: Keep finished mints in an airtight container at room temperature to maintain their freshness.
Best Side Dishes for Old-Fashioned Butter Mints
Old-Fashioned Butter Mints pair wonderfully with certain dishes. Here’s a list of side dishes that complement their sweetness perfectly.
-
Cheese Platter
A selection of soft and hard cheeses balances the sweetness of the mints, creating a delightful contrast. -
Fresh Fruit Salad
Light and refreshing, this dish adds natural sweetness while enhancing the minty flavor of your treats. -
Vanilla Ice Cream
The creamy texture of ice cream pairs wonderfully with the melt-in-your-mouth quality of the mints for a delightful dessert duo. -
Chocolate Fondue
Rich chocolate provides an indulgent experience that matches well with the fresh taste of butter mints for dipping. -
Nut Mix
A savory nut mix offers crunchiness and saltiness that contrasts nicely with the sweet flavors of the mints. -
Mini Cupcakes
Lightly frosted mini cupcakes can serve as another sweet treat without overpowering the delightful taste of butter mints.
Common Mistakes to Avoid
Making Old-Fashioned Butter Mints can be simple, but small mistakes can affect the final product. Here are some common pitfalls to watch out for:
- Using cold butter – Cold butter won’t blend well, resulting in a lumpy texture. Always ensure your butter is softened to room temperature before mixing.
- Skipping the salt – Salt enhances the flavor of the mints. Neglecting it can lead to bland candies. Just a pinch can make a big difference!
- Overmixing the dough – Overmixing can make the mints tough instead of soft and creamy. Mix until just combined for the best texture.
- Not allowing mints to dry – If you skip the drying step, your mints may remain sticky and difficult to handle. Allow them to dry for at least 8 hours or overnight.
- Forgetting food coloring tips – If using food coloring, mix it in gradually. This way, you achieve the desired shade without overdoing it.
Storage & Reheating Instructions
Refrigerator Storage
- Store Old-Fashioned Butter Mints in an airtight container to keep them fresh.
- They can last up to 3 weeks in the refrigerator.
Freezing Old-Fashioned Butter Mints
- Place mints in a single layer on a baking sheet and freeze for 1 hour.
- Transfer them to an airtight container or freezer bag; they will keep for up to 6 months.
Reheating Old-Fashioned Butter Mints
- Oven – Preheat oven to 200°F (93°C) and warm mints for about 5-10 minutes if they become too hard.
- Microwave – Heat mints on a microwave-safe plate for 5-10 seconds, checking frequently to avoid melting.
- Stovetop – Use a double boiler on low heat, stirring gently until softened.
Frequently Asked Questions
If you’re still curious about Old-Fashioned Butter Mints, here are some common questions that might help!
How long do Old-Fashioned Butter Mints last?
Old-Fashioned Butter Mints can last up to 3 weeks in the refrigerator when stored properly.
Can I customize flavors of Old-Fashioned Butter Mints?
Yes! You can substitute peppermint extract with other extracts like vanilla or almond for different flavor profiles.
How do I achieve different colors for my Old-Fashioned Butter Mints?
Divide your dough into portions and knead gel food coloring into each piece until you reach your preferred color.
Are Old-Fashioned Butter Mints gluten-free?
Yes, this recipe is naturally gluten-free since it contains no wheat-based ingredients.
Final Thoughts
Old-Fashioned Butter Mints are not only delightful but also highly customizable. With their creamy texture and subtle mint flavor, they’re perfect for any occasion—from holiday gatherings to casual parties. Don’t hesitate to experiment with colors and flavors to make them uniquely yours!
Old-Fashioned Butter Mints
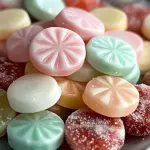
Indulge in the nostalgic sweetness of Old-Fashioned Butter Mints, the perfect bite-sized treat for any celebration. These delightful mints boast a creamy texture and a refreshing hint of peppermint, rekindling fond memories of family gatherings. Ideal for parties, holiday gifts, or simply satisfying a sweet craving, they require no baking and minimal ingredients. You can customize them with vibrant colors to match any occasion, making them not just delicious but also visually appealing.
- Prep Time: 20 minutes
- Cook Time: 0 minutes
- Total Time: 20 minutes
- Yield: About 30 mints 1x
- Category: Dessert
- Method: No Bake
- Cuisine: American
Ingredients
- 1/2 cup unsalted butter, softened
- 4 cups powdered sugar
- 1 tablespoon heavy cream or milk
- 1/2 teaspoon peppermint extract
- 1 pinch salt
- Gel food coloring (optional)
Instructions
- In a large mixing bowl, beat the softened butter until smooth and creamy.
- Add peppermint extract, salt, and cream; mix until well combined.
- Gradually incorporate the powdered sugar until a soft dough forms.
- If using coloring, divide the dough and knead in gel food coloring until evenly distributed.
- Roll the dough into thin ropes on a powdered sugar surface and cut into bite-sized pieces.
- Place mints on parchment paper with space between each piece and let dry at room temperature for 8 hours or overnight before serving.
Nutrition
- Serving Size: 5 mints (15g)
- Calories: 60
- Sugar: 14g
- Sodium: 0mg
- Fat: 2g
- Saturated Fat: 1g
- Unsaturated Fat: 1g
- Trans Fat: 0g
- Carbohydrates: 13g
- Fiber: 0g
- Protein: 0g
- Cholesterol: 5mg