

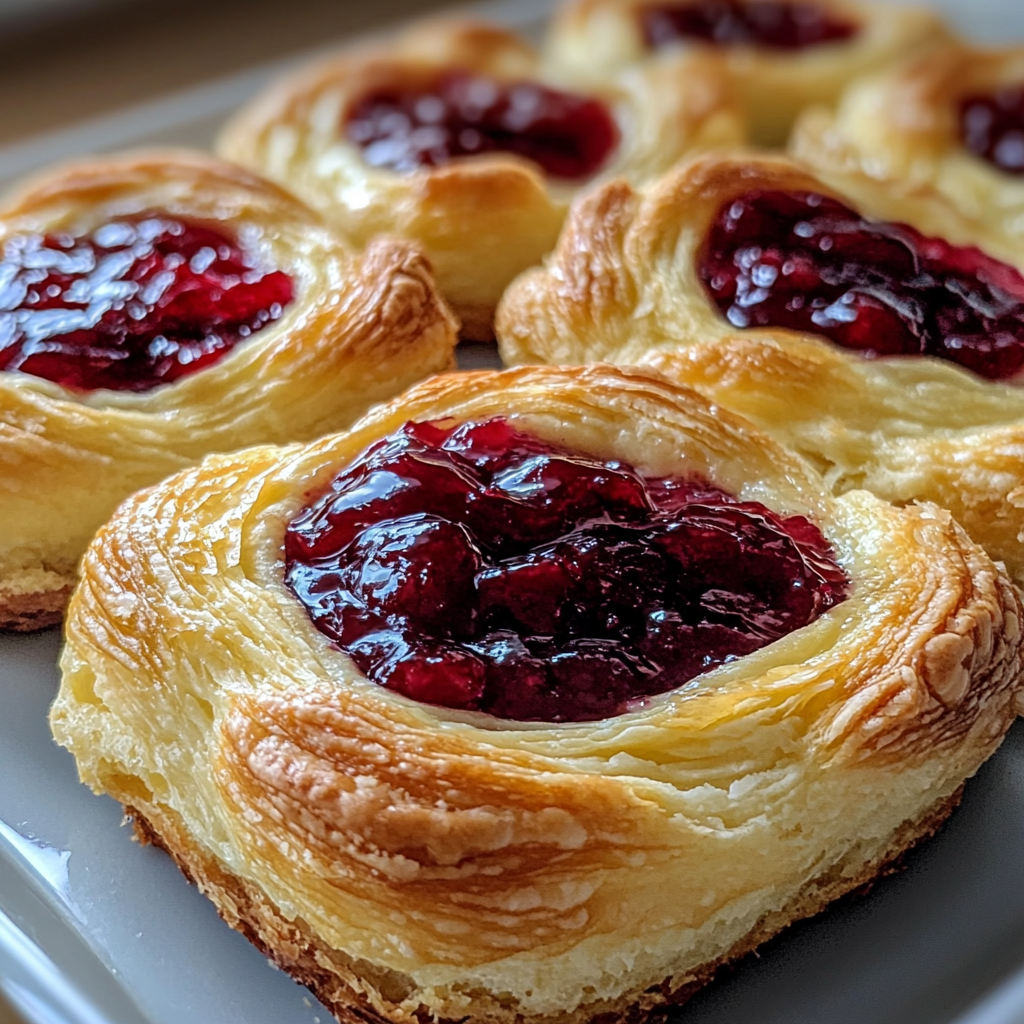
Looking for the best danish pastry idea? This easy cherry cheese danish is quick, simple, and bakery-worthy! With flaky layers, creamy filling, and sweet cherry topping, it’s perfect for holidays, brunches, or last-minute dessert ideas. Great for beginners and guaranteed to impress. Save this easy breakfast treat now!
Why You’ll Love This Recipe
- Quick Preparation: This recipe takes just 28 minutes from start to finish, making it a fantastic option for busy mornings or unexpected guests.
- Flaky and Delicious: The puff pastry provides a wonderfully flaky texture that pairs perfectly with the creamy cheese filling and sweet cherry preserves.
- Versatile Serving Options: Enjoy these pastries as a breakfast treat, a delightful dessert, or even as part of a festive brunch spread.
- Beginner-Friendly: Even if you’re new to baking, this recipe is straightforward and requires minimal skills.
- Customizable Toppings: Feel free to experiment with different fruit preserves or toppings based on your preferences.
Tools and Preparation
Before you dive into making your easy cherry cheese danish, gather your tools. Having everything ready will streamline the process.
Essential Tools and Equipment
- Baking sheet
- Parchment paper
- Mixing bowl
- Whisk or electric mixer
- Pastry brush
Importance of Each Tool
- Baking sheet: A sturdy baking sheet ensures even cooking and prevents sticking when lined with parchment paper.
- Parchment paper: Using parchment paper makes cleanup easy and helps the pastries bake evenly without sticking.
- Mixing bowl: A large mixing bowl is essential for combining ingredients smoothly without spills.
Ingredients
For the Pastry
- 1 sheet puff pastry, thawed
For the Cream Cheese Filling
- 4 oz cream cheese, softened
- 2 tbsp granulated sugar
- 1/2 tsp vanilla extract
- 1/2 tsp lemon zest (optional)
For the Cherry Topping
- 1/4 cup cherry preserves
For the Egg Wash
- 1 egg, beaten
How to Make Easy Cherry Cheese Danish
Step 1: Preheat the Oven
Preheat your oven to 400°F (200°C). Line a baking sheet with parchment paper to ensure your pastries don’t stick while baking.
Step 2: Prepare the Puff Pastry
Unfold the thawed puff pastry on a clean surface. Cut it into squares of equal size. Gently fold the edges inward to create a small border around each square.
Step 3: Make the Cream Cheese Filling
In a mixing bowl, combine the softened cream cheese, granulated sugar, vanilla extract, and lemon zest (if using). Beat until smooth and well combined.
Step 4: Assemble the Pastries
Spoon a generous amount of cream cheese filling into the center of each puff pastry square. Top each filling with a dollop of cherry preserves for added sweetness.
Step 5: Apply Egg Wash
Using a pastry brush, lightly coat the edges of each pastry with beaten egg. This will give them a beautiful golden color when baked.
Step 6: Bake the Pastries
Place your assembled pastries on the prepared baking sheet. Bake in the preheated oven for 15–18 minutes or until they are golden brown and puffed up.
Step 7: Cool and Serve
Once baked, remove them from the oven and allow them to cool slightly on a wire rack. Serve warm or drizzle with glaze if desired for an extra touch of sweetness.
How to Serve Easy Cherry Cheese Danish
Serving your Easy Cherry Cheese Danish can elevate the experience, making it perfect for any occasion. Whether it’s a casual brunch or a fancy dessert, here are some delightful serving suggestions.
With Fresh Fruit
- Serve alongside sliced strawberries, blueberries, or raspberries for a burst of freshness that complements the sweet cherry filling.
Drizzled with Icing
- Add a light glaze made from powdered sugar and water over the pastries for an extra touch of sweetness and visual appeal.
Accompanied by Whipped Cream
- A dollop of lightly whipped cream can enhance the creamy cheese filling and add a luxurious texture to each bite.
With Coffee or Tea
- Pairing with a hot cup of coffee or tea creates a warm atmosphere, ideal for brunch gatherings or cozy afternoons.
Styled on a Dessert Platter
- Arrange several pastries on a beautiful platter with additional fruits and nuts for an eye-catching centerpiece at your next event.
How to Perfect Easy Cherry Cheese Danish
To ensure your Easy Cherry Cheese Danish turns out perfectly every time, follow these simple tips.
- Use Cold Puff Pastry: Keeping the puff pastry cold until baking helps achieve those flaky layers you desire.
- Do Not Overfill: Be sure to spoon just enough filling into each pastry; overfilling can cause spills and prevent proper rising.
- Brush Generously: Apply the egg wash evenly across the edges for a golden-brown finish that looks irresistibly appetizing.
- Monitor Baking Time: Keep an eye on the pastries while they bake; ovens vary, and you’ll want them golden but not burnt.
- Cool Before Serving: Allow the danishes to cool slightly before serving; this makes them easier to handle and enhances their flavor.
Best Side Dishes for Easy Cherry Cheese Danish
Pairing side dishes with your Easy Cherry Cheese Danish can create a well-rounded meal. Here are some great options:
- Fresh Fruit Salad: A mix of seasonal fruits adds brightness and balances sweetness.
- Greek Yogurt Parfait: Layer yogurt with granola and fresh berries for a creamy contrast.
- Scrambled Eggs: Lightly seasoned scrambled eggs provide protein and make it more filling.
- Granola: A crunchy side that adds texture; serve it in small bowls for easy snacking.
- Oven-Baked Bacon Alternatives: Consider turkey bacon or plant-based options for a savory crunch without pork.
- Smoothie Bowl: Blend up a smoothie topped with seeds and nuts for a nutritious addition that complements the danish.
Common Mistakes to Avoid
Making the Easy Cherry Cheese Danish can be a delightful experience, but there are common mistakes that can affect your results.
- Skipping the Thawing Step: Make sure to thaw the puff pastry completely before using it. If it’s still frozen, it won’t puff up properly during baking.
- Overfilling the Pastry: Be cautious not to overfill each square with the cheese mixture and cherry preserves. Too much filling can cause spills and uneven baking.
- Not Brushing with Egg Wash: Applying egg wash creates a beautiful golden finish. Don’t skip this step for an attractive appearance!
- Ignoring Oven Temperature: Always preheat your oven to 400°F before baking. A hot oven is crucial for achieving that flaky texture.
- Not Allowing to Cool: Letting your pastries cool slightly before serving enhances the flavor. Skipping this step can lead to a messy eating experience.
Storage & Reheating Instructions
Refrigerator Storage
-
- Duration: Store in the refrigerator for up to 3 days.
-
- Container: Use an airtight container to keep them fresh and prevent them from drying out.
Freezing Easy Cherry Cheese Danish
-
- Duration: These pastries can be frozen for up to 2 months.
-
- Container: Place in a freezer-safe bag or container, separating layers with parchment paper.
Reheating Easy Cherry Cheese Danish
- Oven: Preheat to 350°F and bake for about 10 minutes until warm. This method helps maintain the pastry’s crispiness.
- Microwave: Heat on medium power for 20-30 seconds. Note that this may make the pastry less flaky.
- Stovetop: Warm on low heat in a non-stick pan for about 5 minutes, turning frequently. This method helps retain some crispiness.
Frequently Asked Questions
Here are some common questions about making the Easy Cherry Cheese Danish:
Can I use other fruits with this recipe?
Absolutely! You can substitute cherry preserves with any fruit preserves like raspberry, blueberry, or apricot for different flavors.
How do I know when my Easy Cherry Cheese Danish is done?
Look for a golden-brown color on the edges of the pastry. The filling should be bubbly and set.
Can I make Easy Cherry Cheese Danish ahead of time?
Yes! You can prepare them ahead and store them in the refrigerator or freeze them before baking. Just remember to adjust cooking times if baking from frozen.
What can I serve with Easy Cherry Cheese Danish?
These pastries pair wonderfully with coffee or tea, making them perfect for brunch or as an afternoon treat.
Final Thoughts
The Easy Cherry Cheese Danish is not only quick and simple but also impressively delicious! It’s versatile enough for any occasion—be it breakfast, dessert, or a sweet snack. Feel free to customize it with your favorite fruit preserves or even add nuts for extra crunch. Give this recipe a try; you won’t be disappointed!
Easy Cherry Cheese Danish

Indulge in the delightful experience of making Easy Cherry Cheese Danish, a sweet pastry that combines flaky puff pastry with a creamy cheese filling and luscious cherry topping. Perfect for any occasion, whether it’s a festive brunch or a casual afternoon treat, this recipe is as simple as it is satisfying. In just 28 minutes, you can create these beautiful pastries that are sure to impress your family and friends. With minimal ingredients and easy-to-follow instructions, even beginner bakers can achieve bakery-worthy results. Customize with different fruit toppings for a personal twist!
- Prep Time: 10 minutes
- Cook Time: 18 minutes
- Total Time: 28 minutes
- Yield: Makes approximately 4 servings 1x
- Category: Dessert
- Method: Baking
- Cuisine: American
Ingredients
- 1 sheet puff pastry, thawed
- 4 oz cream cheese, softened
- 2 tbsp granulated sugar
- 1/2 tsp vanilla extract
- 1/4 cup cherry preserves
- 1 beaten egg (for egg wash)
Instructions
- Preheat your oven to 400°F (200°C) and line a baking sheet with parchment paper.
- Roll out the thawed puff pastry and cut into squares. Fold edges inward to create a border.
- In a mixing bowl, blend cream cheese, sugar, vanilla extract until smooth.
- Spoon cream cheese mixture into the center of each square and top with cherry preserves.
- Brush edges with beaten egg for a golden finish.
- Bake for 15–18 minutes until golden brown and puffed.
- Cool slightly on a wire rack before serving.
Nutrition
- Serving Size: 1 Danish (63g)
- Calories: 215
- Sugar: 9g
- Sodium: 160mg
- Fat: 12g
- Saturated Fat: 6g
- Unsaturated Fat: 6g
- Trans Fat: 0g
- Carbohydrates: 22g
- Fiber: 1g
- Protein: 3g
- Cholesterol: 30mg